<Grid x:Name="LayoutRoot" Background="Gray" MouseLeftButtonUp="onUp"
  VerticalAlignment="Center" HorizontalAlignment="Center">
 <Grid.RowDefinitions>
  <RowDefinition Height="5"/>
  <RowDefinition Height="300"/>
  <RowDefinition Height="5"/>
 </Grid.RowDefinitions>
 <Grid.ColumnDefinitions>
  <ColumnDefinition Width="5"/>
  <ColumnDefinition Width="300"/>
  <ColumnDefinition Width="5"/>
 </Grid.ColumnDefinitions>
 <Grid Grid.Row="1" Grid.Column="1">
  <Rectangle x:Name="posRect"/>
  <Image x:Name="img_show" Stretch="Fill"
    Source="imgs/Orz.png" Opacity="0.9">
   <Image.Clip>
    <RectangleGeometry Rect="0,0,100,100">
     <RectangleGeometry.Transform>
      <TranslateTransform X="0" Y="0" x:Name="clipPosCtrl"/>
     </RectangleGeometry.Transform>
    </RectangleGeometry>
   </Image.Clip>
  </Image>
  <Image x:Name="img_bg" Stretch="Fill"
    Source="imgs/Orz.png" Opacity="0.1"
    MouseLeftButtonDown="onDown" MouseMove="onMove"/>
 </Grid>
</Grid>
接著加入以下程式碼至 .cs中:
private void onDown(object sender, MouseButtonEventArgs e)
{
 mouseIsClick = true;
}
 bool mouseIsClick = false;
private void onUp(object sender, MouseButtonEventArgs e)
{
 mouseIsClick = false;
}
private void onMove(object sender, MouseEventArgs e)
{
 if(!mouseIsClick) return;
 clipPosCtrl.X = e.GetPosition(posRect).X - 50;
 clipPosCtrl.Y = e.GetPosition(posRect).Y - 50;
}
本篇同part 1,使用了兩個Image,上層Image做事件的觸發,下層Image顯示效果,其中主要由
 <RectangleGeometry.Transform>
  <TranslateTransform X="0" Y="0" x:Name="clipPosCtrl"/>
 </RectangleGeometry.Transform>
來控制Clip的效果。
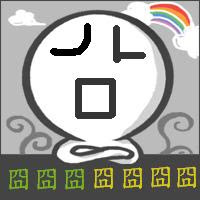
執行結果
沒有留言:
張貼留言